This guide is also available as a YouTube video. Watch it on YouTube or anonymously on Invidious.Loki
- Download Lokinet Windows Client from Lokinet.org/windows
- Install Lokinet in your PC. You need administrative rights to your PC, so don’t try this at your work PC that is managed by IT department.
- Run Lokinet by clicking on the Lokinet icon, it will ask for administrator rights. Just click yes if you are on a standalone PC. If you are on a Windows domain, please contact your IT administrator.
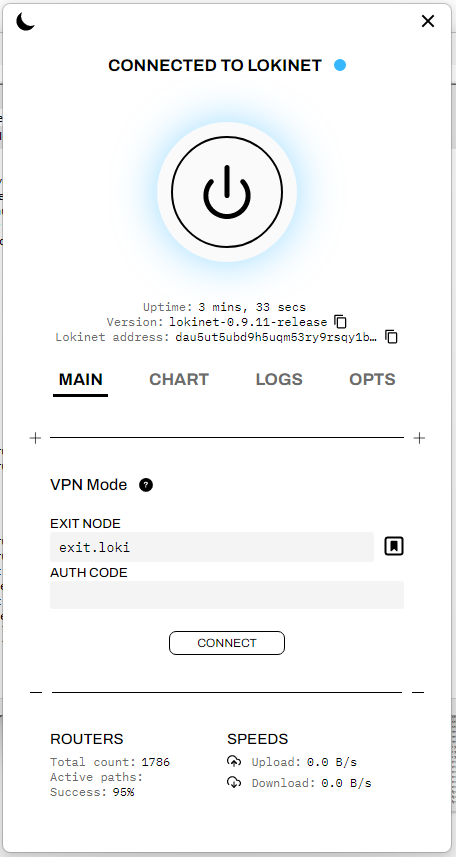
- Once you have Lokinet running and connected to Lokinet and before you start the VPN mode, open a command prompt and try to ping a Lokinet address. You can try directory.loki or mailsnapp.loki. If you get ping replies your computer can now access Lokinet. You will see that the address shown will be something like 172.16.0.2.
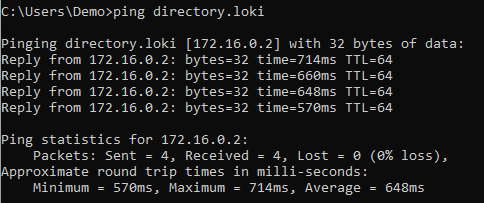 If ping doesn’t work, your security software may have blocked Lokinet.
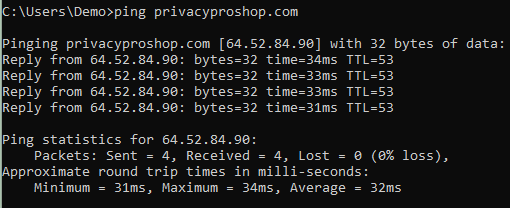
 - Verify that your DNS functions BEFORE connecting to Lokinet VPN, ping an Internet site, such as privacyproshop.com if you get replies, your DNS should be working fine. If not, check your security software.
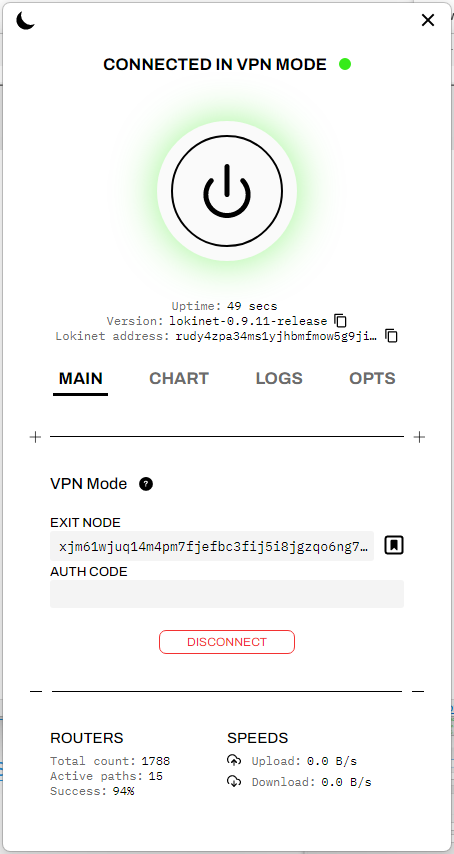
- Enable Lokinet VPN mode. Exit.loki should be listed, if not, choose one of the free exit nodes from here, and click the “Connect” button below the Auth Code field. Free nodes don’t use an Auth Code. Once Lokinet is connected in VPN Mode, go back to the command prompt and ping a lokinet site to make sure Lokinet addresses still resolve. Ping something like directory.loki – if it doesn’t respond, make sure Lokinet didn’t disconnect. Notice that the exit node address changes from exit.loki to the Lokinet real address, which is xjm61wjuq14m4pm7fjefij5i8jgzqo6ng7mqnp8hosx3jzsy.loki
- Ping a different internet address, such as oxen.directory to make sure you are not getting cached responses. If it works, great, if it doesn’t, you’ll get something like “Ping request could not find host oxen.directory. Please check the name and try again”

- To fix the problem disconnect from Lokinet VPN mode and go to YogaDNS.com and download & install YogaDNS. It will be installed in the full mode, and in 30 days will revert to the free mode. The free mode works just as well, so no need to buy it.

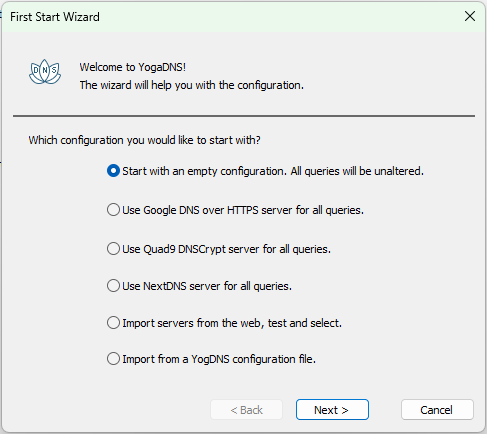
- First Start Wizard will start. Choose the first option “Start with an empty configuration. All queries will be unaltered” Click next, click OK in the dialog that pops up and says “YogaDNS has been started with an empty configuration. You can now add DNS servers and create rules”
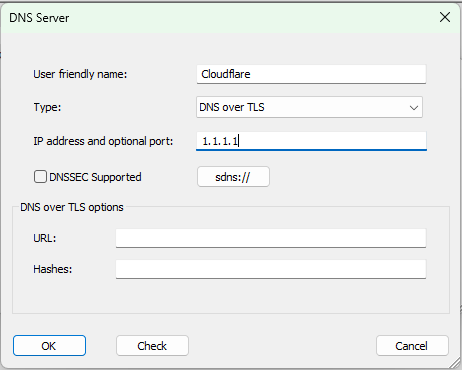
- Click Configuration Menu–> DNS Servers… and click “Add..” Then type Cloudflare (or whatever you like) in the “User friendly name” field, Choose DNS over TLS in the “Type” field, Type 1.1.1.1 in the “IP address and optional port” field and click OK. Then OK again, and click Yes to the dialog that pops up with the message “You do not have any DNS servers assigned to the resolve rules. Would you like to set server Cloudflare as the default for all queries?”
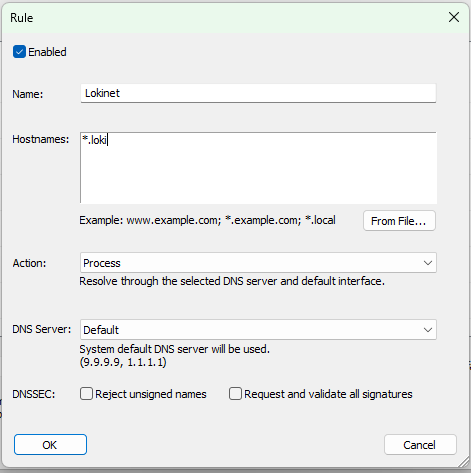
- Click “Rules” button, click “Add…” and create a rule named Lokinet. In the “Hostnames” field enter *.loki and leave both “Action” field at Process and “DNS Server” field at Default. Click OK.
- Now both Lokinet and Internet addresses should resolve properly.

