
You can change or add an encryption key for your NemoMail account here: https://sn1.sutinen.com/update_nemomail_pgpkey.php
The form allows you to update your NemoMail PGP Public Key. You will need your account username and password, as well as your Order Number and Confirmation Code to process this update.
If you don’t have your Password, Order Number or Confirmation Code, you can contact us on Session to ONS name: PrivacyProShop using the Session ID you provided to us when you signed up for the account and we can perform the change for you. If you didn’t provide a Session ID when you signed up, we will not be able to help you.
Author: Support Team
NemoMail Password Change
You can change your NemoMail password here: https://sn1.sutinen.com/reset_nemomail_password.php
You will need your purchase Order Number and Confirmation Codes to be able to perform the change.
If you don’t have your Order Number or Confirmation Code, you can contact us on Session to ONS name: PrivacyProShop using the Session ID you provided to us when you signed up for the account. If you didn’t provide a Session ID when you signed up, we will not be able to help you.
NemoMail POP3, IMAP4, SMTP & Webmail settings
NOTE: Lokinet is encrypted on the protocol level, your data is safe in transit, no SMTP, POP3, IMAP4 or HTTPS encryption is needed to have a secure connection.
These settings terms are what Thunderbird uses. If your mail client doesn’t support these, please download Thunderbird as it is available for Windows, Linux & MacOS.
SMTP settings:
– SMTP server address: nemo.loki
– SMTP port: 587
– Connection Security: None (no encryption)
– Authentication method: Normal password
– User name: Same as your email address
POP3 settings:
– POP3 server address: nemo.loki
– POP3 port: 110
– Connection security: None (no encryption)
– Authentication method: Normal password
– User name: Same as your email address
IMAP4 settings: YOU SHOULD USE POP3 for privacy!!! IMAP4 is more convenient but less private than POP3. Please also remember that NemoMail doesn’t backup your email. Use POP3 to download your email to your own computer!
– IMAP4 server address: nemo.loki
– IMAP4 port: 143
– Connection Security: None (no encryption)
– Authentication method: Normal password
– User name: Same as your email address
Webmail:
– Access at http://nemo.loki
How to get Lokinet working on Windows 10 & 11 – Lokinet version 0.9.11
This guide is also available as a YouTube video. Watch it on YouTube or anonymously on Invidious.Loki
- Download Lokinet Windows Client from Lokinet.org/windows
- Install Lokinet in your PC. You need administrative rights to your PC, so don’t try this at your work PC that is managed by IT department.
- Run Lokinet by clicking on the Lokinet icon, it will ask for administrator rights. Just click yes if you are on a standalone PC. If you are on a Windows domain, please contact your IT administrator.
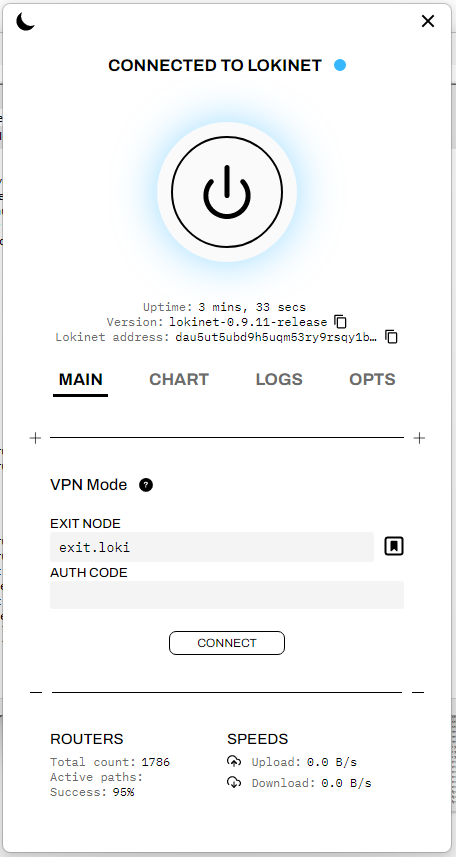
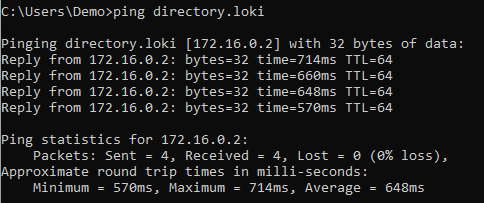
- Once you have Lokinet running and connected to Lokinet and before you start the VPN mode, open a command prompt and try to ping a Lokinet address. You can try directory.loki or mailsnapp.loki. If you get ping replies your computer can now access Lokinet. You will see that the address shown will be something like 172.16.0.2.
 If ping doesn’t work, your security software may have blocked Lokinet.
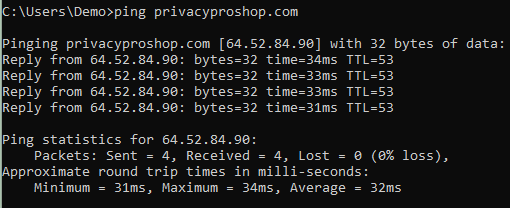
 - Verify that your DNS functions BEFORE connecting to Lokinet VPN, ping an Internet site, such as privacyproshop.com if you get replies, your DNS should be working fine. If not, check your security software.
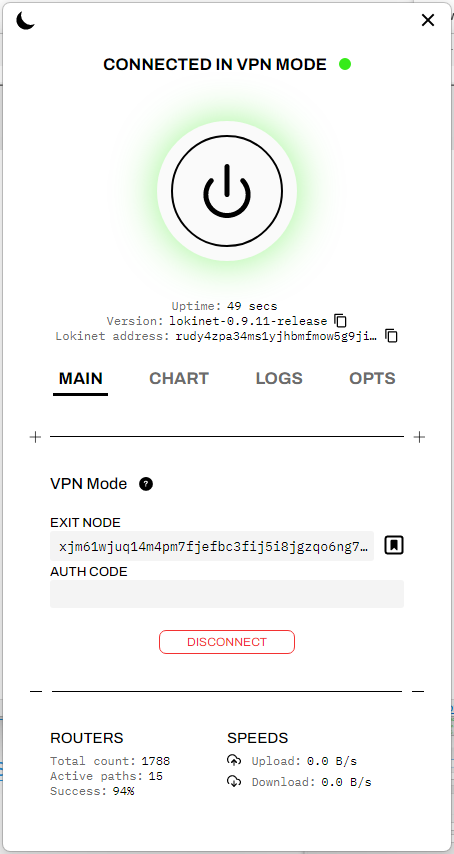
- Enable Lokinet VPN mode. Exit.loki should be listed, if not, choose one of the free exit nodes from here, and click the “Connect” button below the Auth Code field. Free nodes don’t use an Auth Code. Once Lokinet is connected in VPN Mode, go back to the command prompt and ping a lokinet site to make sure Lokinet addresses still resolve. Ping something like directory.loki – if it doesn’t respond, make sure Lokinet didn’t disconnect. Notice that the exit node address changes from exit.loki to the Lokinet real address, which is xjm61wjuq14m4pm7fjefij5i8jgzqo6ng7mqnp8hosx3jzsy.loki
- Ping a different internet address, such as oxen.directory to make sure you are not getting cached responses. If it works, great, if it doesn’t, you’ll get something like “Ping request could not find host oxen.directory. Please check the name and try again”

- To fix the problem disconnect from Lokinet VPN mode and go to YogaDNS.com and download & install YogaDNS. It will be installed in the full mode, and in 30 days will revert to the free mode. The free mode works just as well, so no need to buy it.
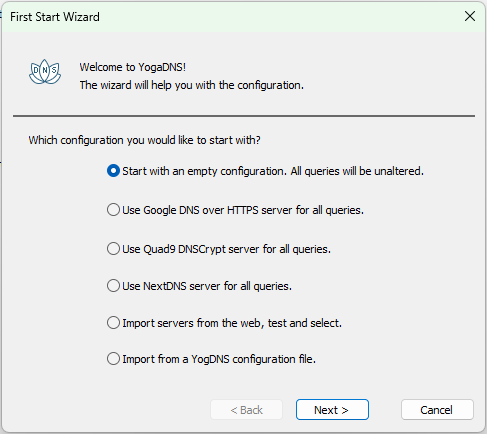
- First Start Wizard will start. Choose the first option “Start with an empty configuration. All queries will be unaltered” Click next, click OK in the dialog that pops up and says “YogaDNS has been started with an empty configuration. You can now add DNS servers and create rules”
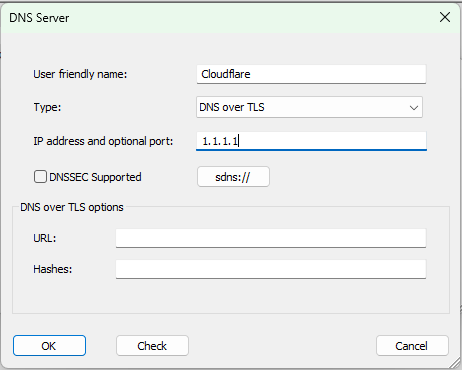
- Click Configuration Menu–> DNS Servers… and click “Add..” Then type Cloudflare (or whatever you like) in the “User friendly name” field, Choose DNS over TLS in the “Type” field, Type 1.1.1.1 in the “IP address and optional port” field and click OK. Then OK again, and click Yes to the dialog that pops up with the message “You do not have any DNS servers assigned to the resolve rules. Would you like to set server Cloudflare as the default for all queries?”
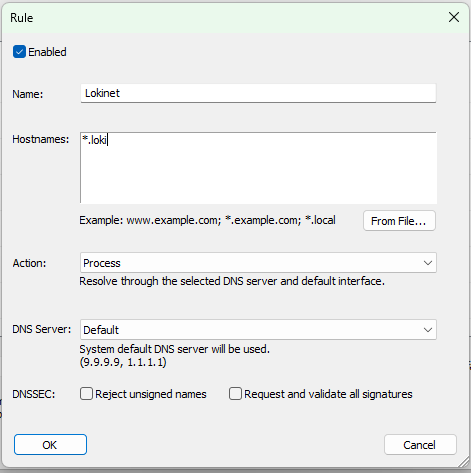
- Click “Rules” button, click “Add…” and create a rule named Lokinet. In the “Hostnames” field enter *.loki and leave both “Action” field at Process and “DNS Server” field at Default. Click OK.
- Now both Lokinet and Internet addresses should resolve properly.
Google Pixel Product Number Decoder
Truly anonymous VPN access using Lokinet Onion Routed exit nodes $8/month
From PrivacyProShop.com
Pixel Phones with 4G LTE Only Radio
Pixel 4: G020I (North America & Taiwan), G020M (Rest of the World), G020N (Japan)
Pixel 4 XL: G020J (North America & Taiwan), G020M (Rest of the World), G020N (Japan)
Pixel 4a: G025J (North America & Taiwan), G025N (Rest of the Word), G025M (Japan)
Pixel Phones with 4G LTE & Sub-6 5G Radios
Pixel 4a 5G: G025E (North America & Taiwan), G025I (Rest of the World), G025H (Japan)
Pixel 5: GTT9Q (UK, EU, CA, AU, TW, SG), G5NZ6 (Japan)
Pixel 5a: G1F8F (USA), G4S1M (Japan)
Pixel 6: GB7N6 (Rest of the World), GR1YH (Japan)
Pixel 6 Pro: GLU0G (World)
Pixel 6a: GX7AS (Rest of the World), G1AZG (EMEA+: UK, DE, IE, FR, ES, IT, AU, DK, NO, SE, NL), GB17L (Japan)
Pixel 7: GVU6C (Rest of the World), GO3Z5 (Japan)
Pixel 7 Pro: GP4BC
Pixel Phones with 4G LTE, Sub-6 5G & mmWave 5G Radios
Pixel 4a5G: G6QU3 (Verizon) Supports bands n260 (39GHz) & 261 (28 GHz)
Pixel 5: GD1YQ (USA) Supports bands n260 (39GHz) & n261 (28 GHz)
Pixel 6: G9S9B1 Supports bands n257 (28GHz), n258 (26GHz), n260 (39GHz), n261 (28GHz)
Pixel 6 Pro: G8V0U (Rest of the World), GF5KQ (Japan only), Both support bands n257 (28GHz), n258 (26GHz), n260 (39GHz), n261 (28GHz)
Pixel 6a: GB62Z (Verizon) Supports bands n260 (39GHz) & 261 (28 GHz)
Pixel 7: GQML3 Supports bands n260 (39GHz) & 261 (28 GHz)
Pixel 7 Pro: GE2AE (Rest of the World), GFE4J (Japan) Both support bands n257 (28GHz), n258 (26GHz), n260 (39GHz), n261 (28GHz)
Howto use two Session IDs in one Android device
Video version of this guide is available at YouTube.
- Download and install F-Droid version of Session from F-Droid App Store. If you don’t have the F-Droid App Store, go to f-droid.org and download and install the F-Droid APK file.
- Download and install the Official Version of Session from Aurora Store (de-Googled phone) or Google Play store (normal spy phone), or get the APK file from getsession.org
- Open each one of them and create or restore Session IDs.
- To make it easier to recognize which version is which, change the Appearance of one of them to a different color scheme.
- Start sending messages!
How to use multiple Session Messenger identities in Windows
This guide is also available as a YouTube video
While Session doesn’t have direct support for multiple identities within the app, you can start several copies of the app and have each of them with a different identity. Here is how to do it:
- Install Session from GetSession.org
- Make a copy of the Session Icon on the desktop
- Edit the properties of the icons:
Add –user-data-dir=c:\users\yourname\session1 to the end of the Target field on the Session icon and,
–user-data-dir=c:\users\yourname\session2 to the Session-Copy icon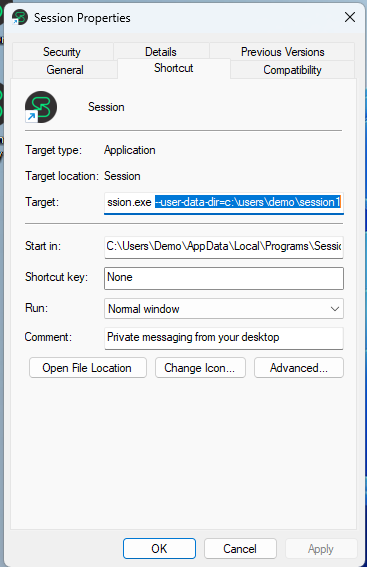
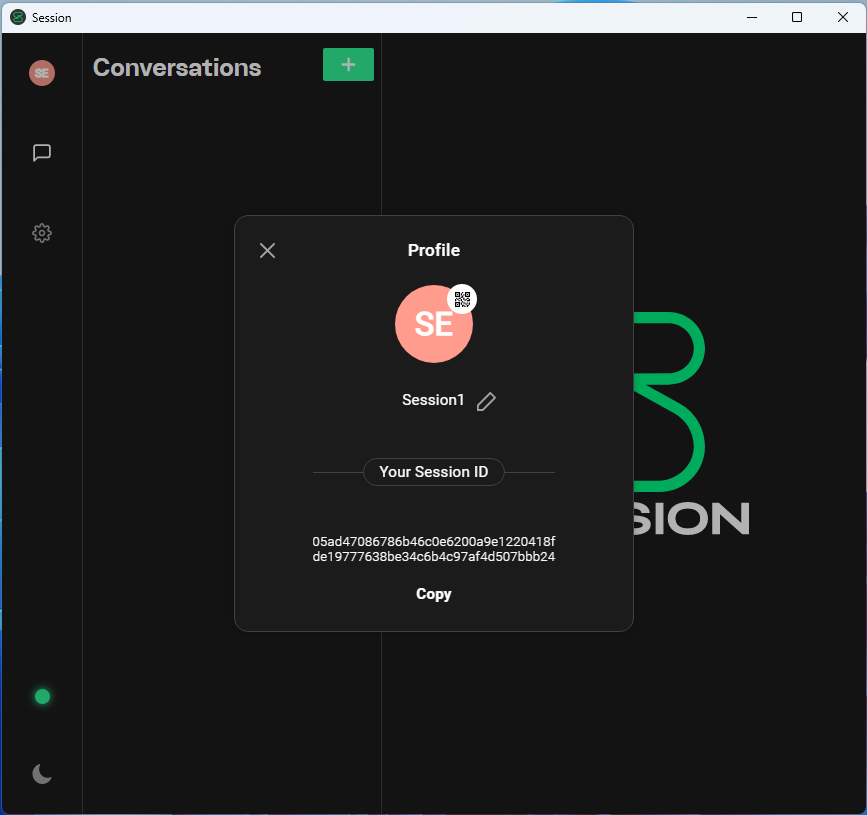
- Start Session (the original Icon) and create or restore an account

- Start the Copy of Session and create or restore an account
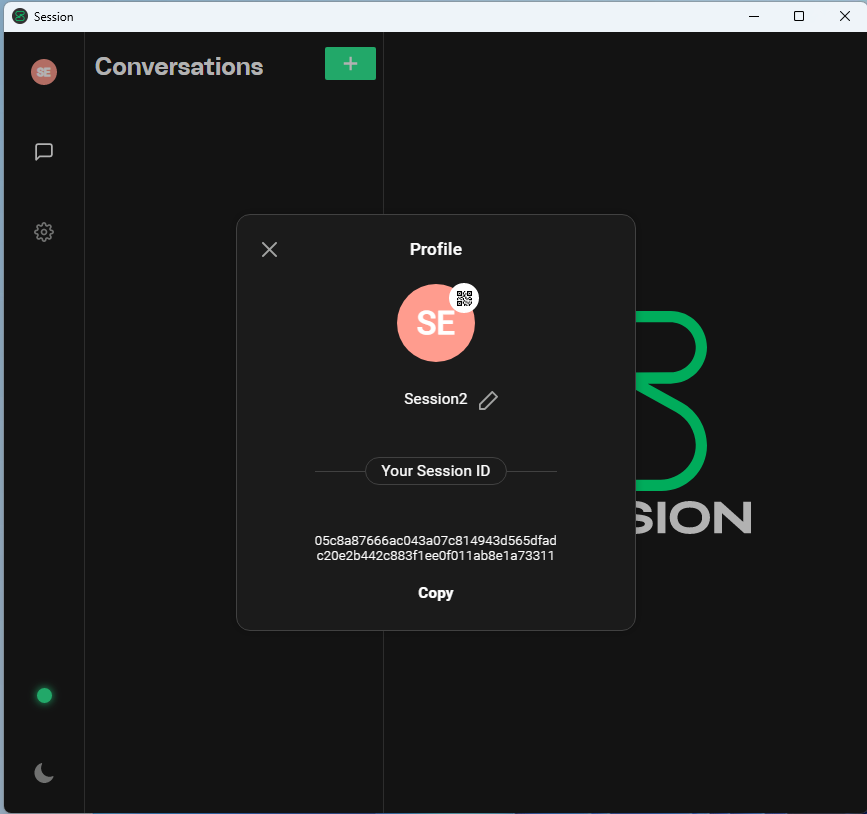 Change Appearance to another theme to make it easier to differentiate the two accounts
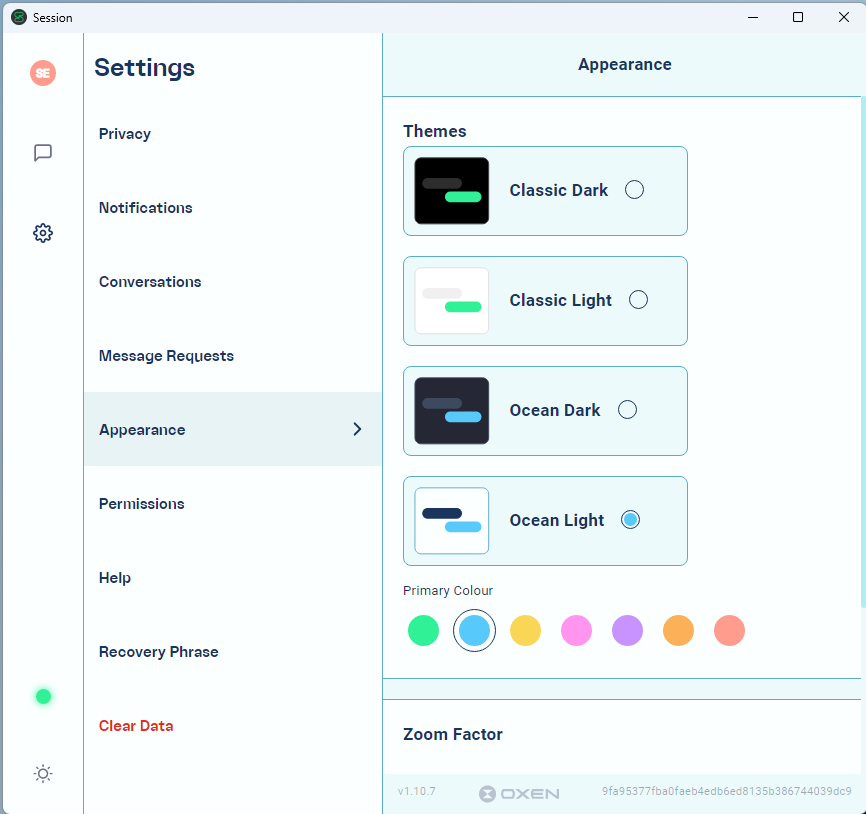
- Start messaging!
Howto Install & Fix Lokinet GUI and DNS on Pop!_Os, Ubuntu or Debian

A less comprehensive version of this guide is available on Youtube. You can also watch it anonymously over Lokinet at Invidious.loki
This guide has been done on Pop!_OS 22.04 LTS, but it should work for any Ubuntu based system, and most likely Debian.
- Add Oxen Debian repository to apt and update it:
sudo curl -so /etc/apt/trusted.gpg.d/oxen.gpg https://deb.oxen.io/pub.gpgecho "deb https://deb.oxen.io $(lsb_release -sc) main" | sudo tee /etc/apt/sources.list.d/oxen.list
NOTE: Linux Mint uses a different release naming scheme that doesn’t work with the command above. Instead, choose one of the commands below depending on which Linux Mint version you use
Linux Mint 19, 19.1, 19.2 or 19.3:echo "deb https://deb.oxen.io bionic main" | sudo tee /etc/apt/sources.list.d/oxen.list
Linux Mint 20, 20.1, 20.2, 20.3:echo "deb https://deb.oxen.io focal main" | sudo tee /etc/apt/sources.list.d/oxen.list
Linux Mint 21, 21.1 or 21.2:echo "deb https://deb.oxen.io jammy main" | sudo tee /etc/apt/sources.list.d/oxen.listsudo apt update - Then install Lokinet-GUI panel. This installs several packages, in my case, on Pop!_Os 22.04 LTS it installed 15 packages.
sudo apt install lokinet-gui - Normally DNS is controlled by Network Manager and systemd-resolved services and those always mess up DNS. Here we’ll disable the automatic DNS management, so stuff stays intact in
/etc/resolv.conf
Disable and stop the systemd-resolved service:sudo systemctl disable systemd-resolvedsudo systemctl stop systemd-resolved
Then put the following line in the[main]section of your/etc/NetworkManager/NetworkManager.conf:dns=default
Delete the symbolic link/etc/resolv.confrm /etc/resolv.conf
Restart NetworkManagersudo systemctl restart NetworkManager
Then create your own/etc/resolv.confvi /etc/resolv.conf
add this line in the empty filenameserver 127.3.2.1
Save the file. Now your DNS resolver is Lokinet. So, if your name resolution at some point has problems, restarting Lokinet will probably fix the problem. Here’s the command if you need to do it:sudo systemctl restart lokinetIf restarting Lokinet doesn’t fix your DNS problem, you can always change the resolver defined in/etc/resolv.confto another server, such as Cloudflare’s 1.1.1.1 or Quad9’s 9.9.9.9 - You should now be able to get to Lokinet and clearnet (=the regular Internet) sites. Test that with ping:
ping directory.lokiand you should get responses like this back:PING directory.loki (172.16.0.3) 56(84) bytes of data.64 bytes from c1zkk4e4ug16xz8our1waeims8drhnc558erioqx35pzyg7w8ryo.loki (172.16.0.3): icmp_seq=1 ttl=64 time=553 ms64 bytes from c1zkk4e4ug16xz8our1waeims8drhnc558erioqx35pzyg7w8ryo.loki (172.16.0.3): icmp_seq=2 ttl=64 time=575 ms
and when you ping a clearnet site, such asPrivacyProShop.comyou should get responses like this:PING PrivacyProShop.com (64.52.84.90) 56(84) bytes of data.64 bytes from 64.52.84.90.static.skysilk.com (64.52.84.90): icmp_seq=1 ttl=53 time=33.3 ms64 bytes from 64.52.84.90.static.skysilk.com (64.52.84.90): icmp_seq=2 ttl=53 time=31.6 ms
Notice how much shorter the ping times are on clearnet vs Lokinet. With Lokinet your ping times are usually several hundred milliseconds vs. 30-60 ms over the clearnet. - Then try Lokinet GUI Panel
Start by clicking on the Lokinet GUI Icon The control panel will probably crash. If it does, you will need to edit a file, use a text editor (FYI: real men use vi)
sudo vi /usr/share/applications/lokinet-gui.desktop
find this line:Exec=/opt/Lokinet-GUI/lokinet-gui %U
and replace%Uwith--no-sandboxlike this:Exec=/opt/Lokinet-GUI/lokinet-gui --no-sandbox
Then log out of Gnome and log back in and Lokinet GUI should now start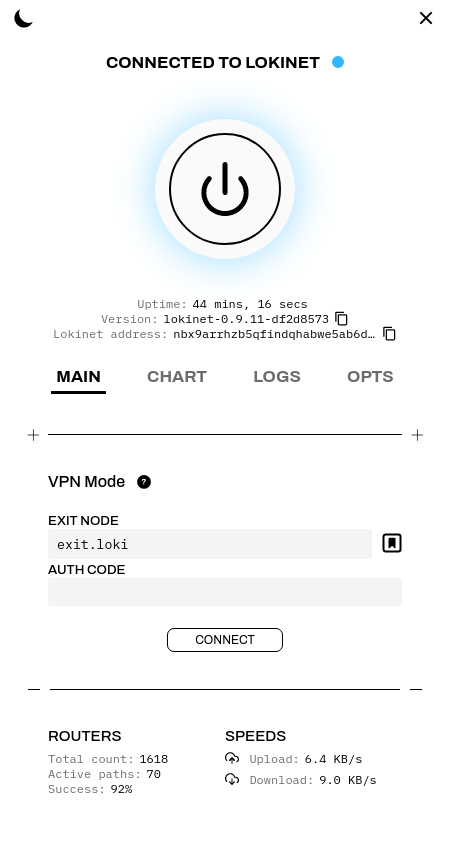
- Lokinet is running as a service, so it is running all the time, this GUI panel allows you to see your connection time, version and your Lokinet address. You can also start Lokinet VPN mode using an exit node address. Exit.loki is the default node, but there are other free ones, too. You can find those at https://oxen.directory/exitnodes or you can purchase access to fast commercial nodes at https://PrivacyProShop.com and support this site!
To start, press the “Connect” button below the exit.loki exit node. Exit.loki doesn’t require an Auth Code, so you can leave that blank. After a few seconds of connecting, the button should say “Connected in VPN Mode” . Also, you will notice that exit.loki will change to a long Lokinet address as the system connects.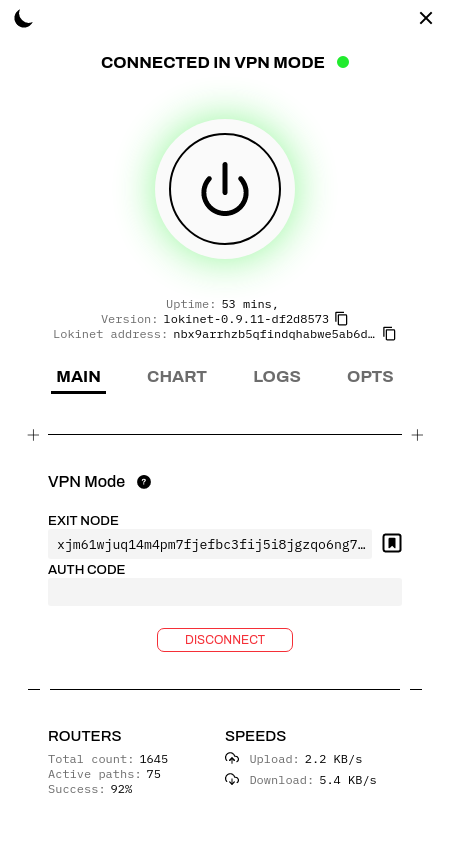
- When you open and close Lokinet exit nodes, Lokinet occasionally crashes. When Lokinet crashes, it will stop all access to the network. To get things back to normal, open a command prompt and restart Lokinet and everything will be good again:
sudo systemctl restart lokinet
12 Misconceptions and Myths about Session Messenger
This is also available as a YouTube video. Watch it on YouTube
- Session is a copy of Signal
Partially true. Session uses code from Signal, and Session used to use the Signal Protocol, but in 2020 Session switched to their own Session protocol that is more suitable for Session’s decentralized network. - Session is completely decentralized
No, it isn’t. Session depends on centralized bootstrap servers, or “seed nodes”. Those servers are run by Oxen Privacy Tech Foundation (OPTF) and are in some way gatekeepers to Session, as if you can’t reach them, you can’t use Session. In the fall of 2022 the Iranian government blocked access to Session’s seed nodes and effectively blocked Session in Iran unless you used a VPN.
For file attachments Session requires a file server. OPTF runs those and limits users to 6MB per attachment. Those are centralized servers.
Same with Voice and Video calls – they require a signalling server operated by OPTF. - Session will never reveal my IP address to any third party
That is true as long as you don’t use Session Peer-to-Peer voice and video calls. If you use Session for voice or video calls your IP address is revealed to the party you call, and to the WebRTC signalling server run by OPTF. - Official Session App is available on F-Droid
No, it isn’t. The official Session Android app has Google’s Firebase code in it for notifications. The Unofficial F-Droid version of Session removes Google Firebase but is not compiled by the Official Session Team. However, the Official Session Team provides a repository that can be added to F-Droid. - The name I choose when I setup Session is the name I can be contacted with
No, it isn’t. That’s just a display name. There are only two ways you can be contacted with on Session: 1) Your Session ID and 2) Your Session ONS name or names that link to your Session ID. To get a Session ONS name you have to pay for it. You can purchase a name using the Oxen wallet if you own Oxen crypto currency. If you don’t have Oxen you can go to PrivacyProShop.com and purchase one with other cryptos or credit card. - Group calling is coming to Session sometime in the future
Maybe, maybe not. Group calls require a central server that has lots of bandwidth in order for the calls to work, and all of the call partcicipant IP addresses would be exposed to that server. So, it wouldn’t be a privacy-friendly addon to Session. However, it would be convenient for most people. - Session groups are ideal for large groups for private messaging
Not yet. Session groups are limited to 100 members at this point. There are plans to increase that, but so far users are limited to 100. - Session Communities offer a private, secure discussion forum
Nope. Session communities, formerly called Session Open Groups can be joined by anyone without any authentication. They are just that, communities of people where you can discuss things anonymously, but without any security or privacy. Many Session communities even publish all messages on a public web page. - Session runs over Lokinet
Nope, it doesn’t. Session uses its own version of onion routing called “Onion Requests” to accomplish the anonymity benefits. There are plans in place to move Session to use Lokinet, but that is still way off. Moving Session to Lokinet would make it possible to have anonymous onion routed voice and video calls. It would likely also improve Session’s speed. - Session is Built in Australia, so it isn’t secure
Australia has some anti-encryption and pro-surveillance laws, and it is a Five Eyes surveillance country. However, Session is secure, because it is an open source app, and the Oxen network is a decentralized network of about 1,800 servers worldwide. The Session team has no access to these servers as they are run by those who participate in the Oxen network by staking Oxen cryptocurrency. No need to worry, Session is secure. - Session saves you messages forever in the Oxen blockchain
Nope. Your messages are kept in a collection of Oxen Service Nodes called a swarm for two weeks. Once the message age reaches two weeks it will be deleted. Messages are stored end-to-end encrypted, so only you can read your messages. Without the message storage your Session would have to be online all the time in order to receive messages. Oxen blockchain is used for keeping Session ONS names. - Session is a scam because it is built on a cryptocurrency network
Nope. Session uses the Oxen Network for routing and storing messages. Oxen crypto is used to pay the operators of the network so they have an incentive to provide services on the network. Without the cryto backing Session wouldn’t exist. Oxen crypto is also used to purchase Session usernames. Without the crypto staking integration a large operator could simply buy enough servers to control a majority of the servers and Session could more easily be compromised. With the crypto integration the price of this type of attack would be very high and would drive up the price of Oxen crypto, and it would be easily detected.
How to buy a Lokinet ONS Domain Name
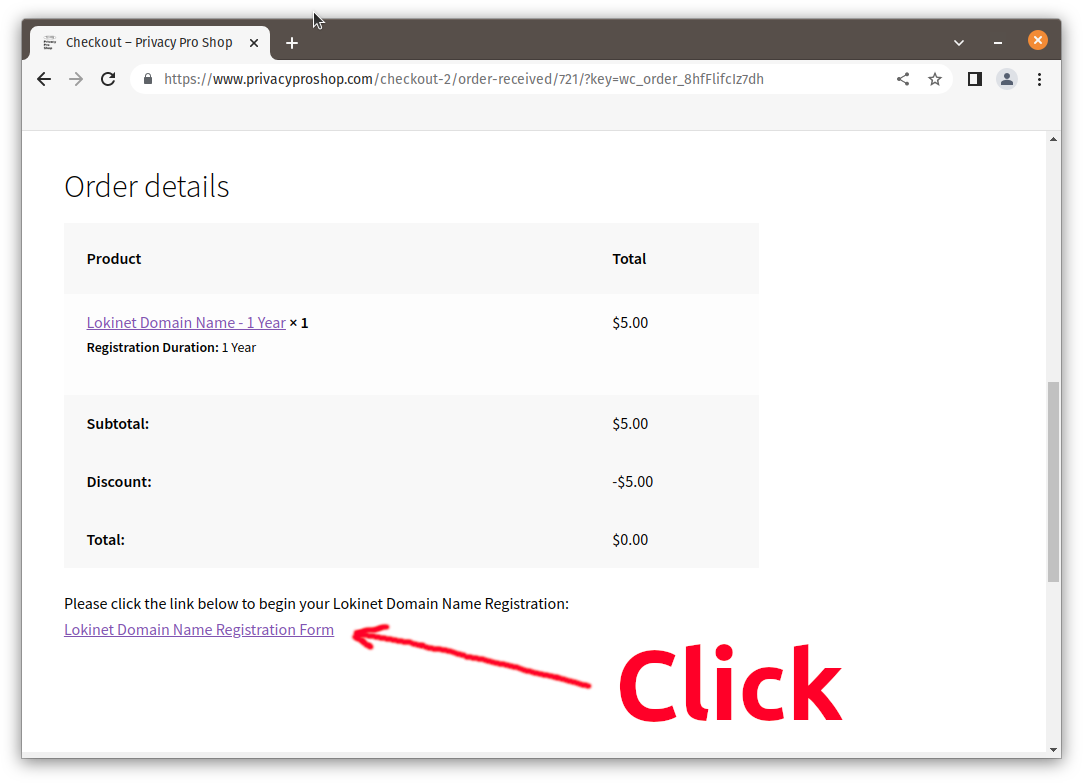
- Purchase a Lokinet ONS Domain Name Registration for 1, 2, 5 or 10 years at PrivacyProShop.com. On the Order Received Page scroll to the bottom of the page and click the Lokinet Domain Registration Form link
Make a note of your Order Number and Confirmation code on the Thank You page. Please write them down, then click “Continue to Registration”: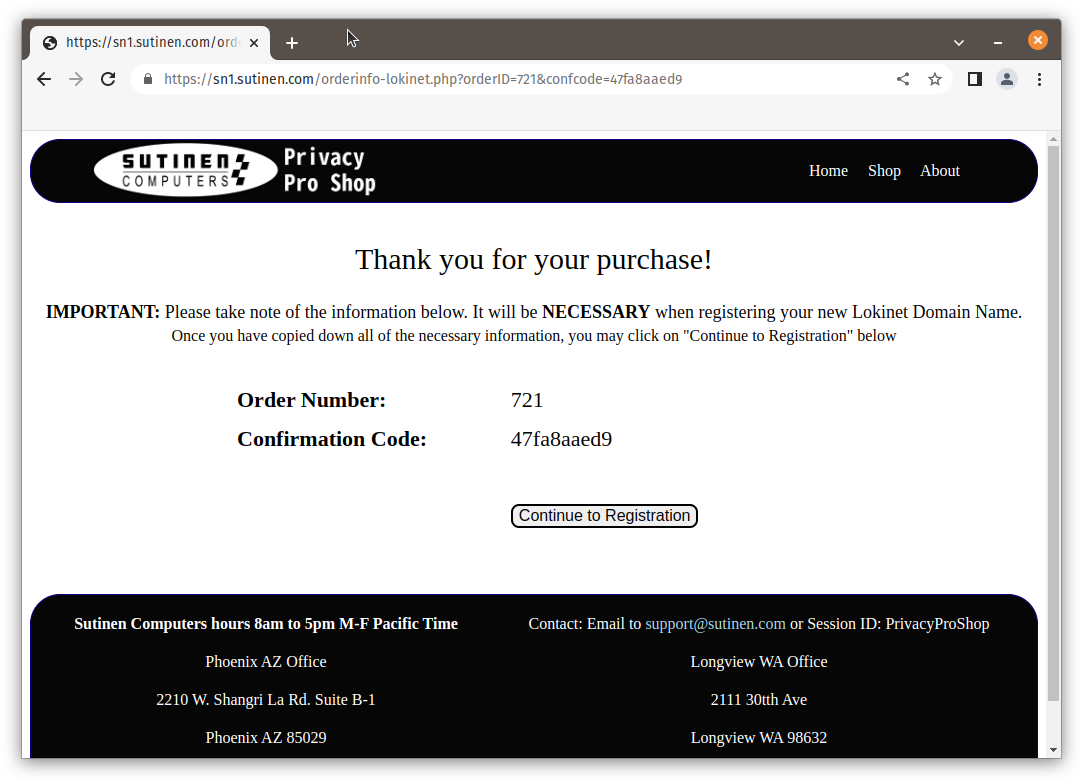 Type in the Domain Name you wish to purchase, and press the tab key, or click another field to initiate the search. Then fill in your Oxen Wallet address, and Lokinet Address you wish to link to the new domain name. See steps 2 & 3 below for information on how to get them.
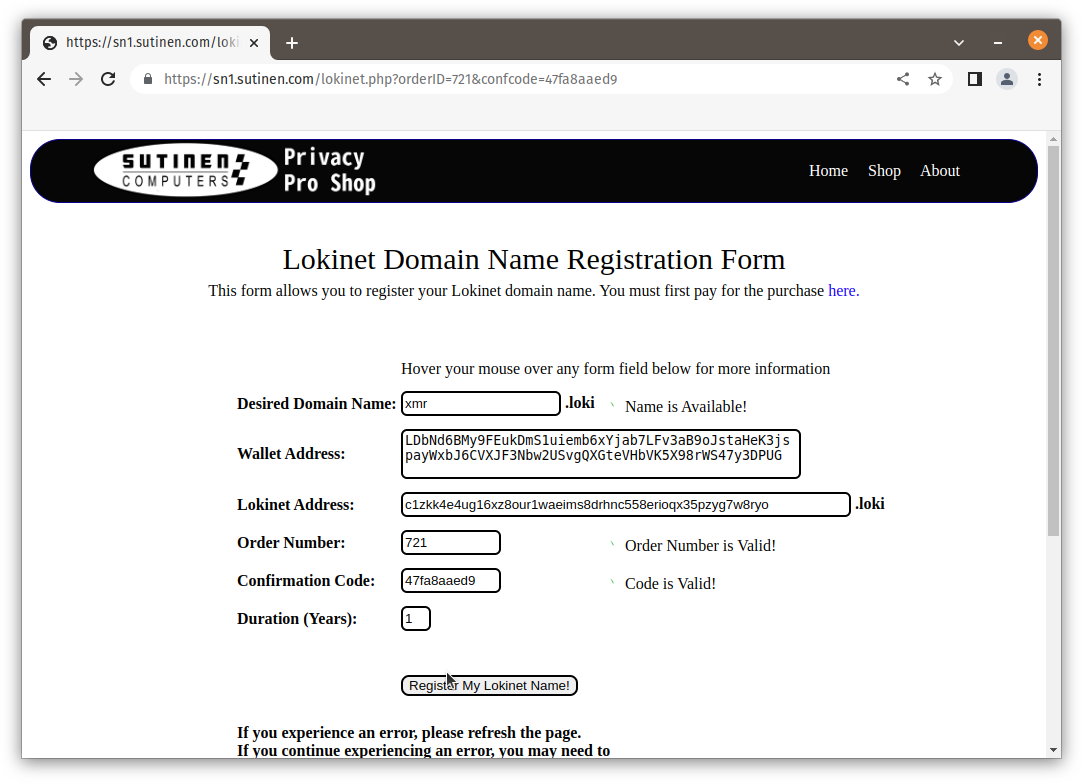 When everything looks good, click on “Register My Lokinet Name!” button and registration should happen. You canb check the Transaction Details by clicking the button. It does a lookup against Oxen’s Blockchain and should show your name registered.
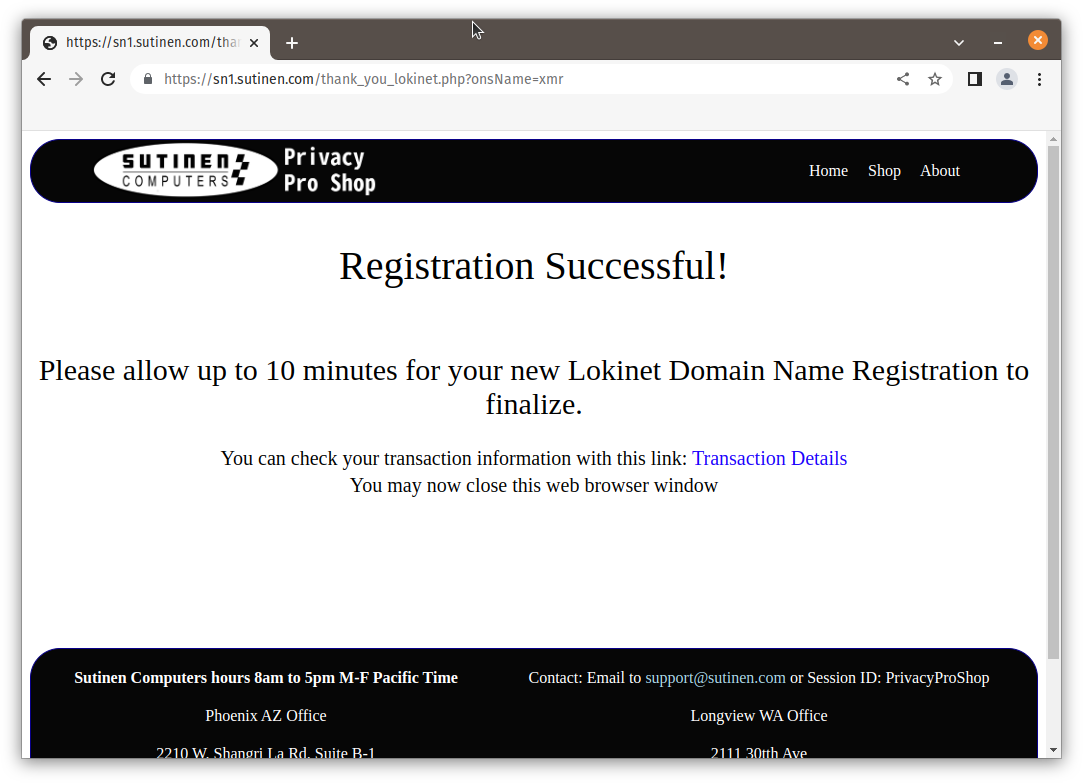 Oxen Blockchain Explorer will show output like this:
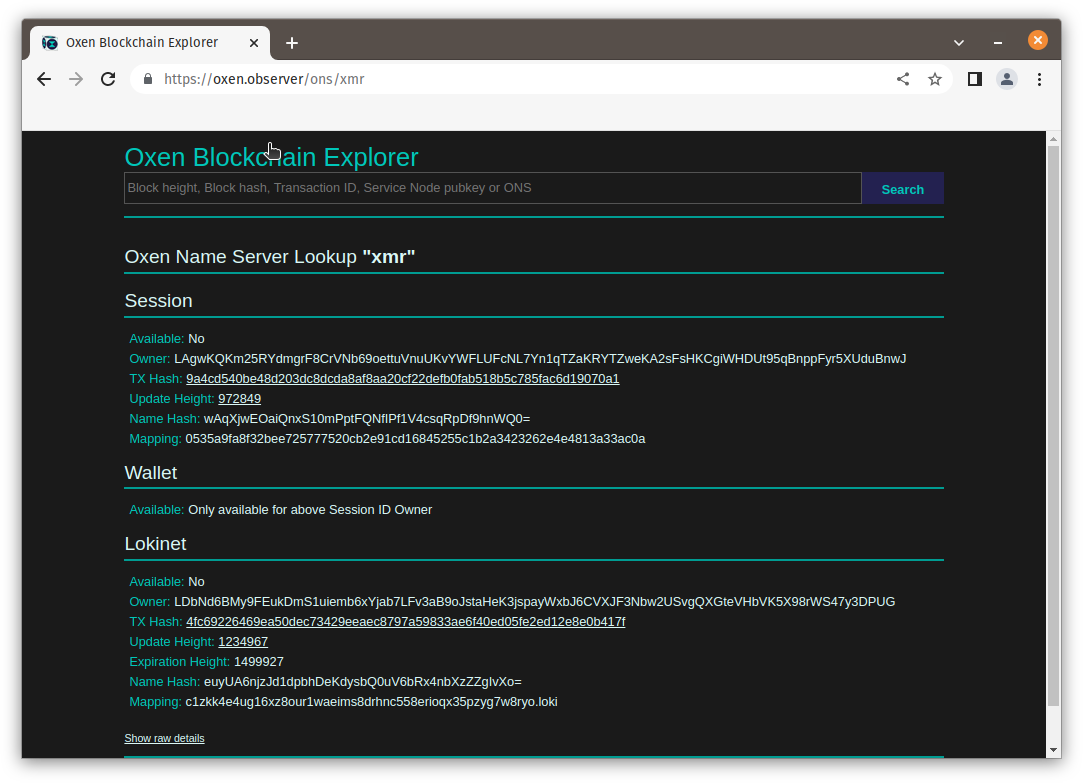
- If you don’t have an Oxen wallet yet, please download and install the Oxen wallet. Create a wallet – pretty much just follow the prompts and enter a password if you would like. In the wallet, click on the copy button to get your wallet address:

- Find the Lokinet address you would like to map to the Lokinet Domain Name, use this command:
host -t cname localhost.loki 127.3.2.1
Or, if you just need a temporary holding place for your domain, you can always get your own Lokinet address form the Lokinet GUI program, just click on the copy button to the right of the Lokinet address: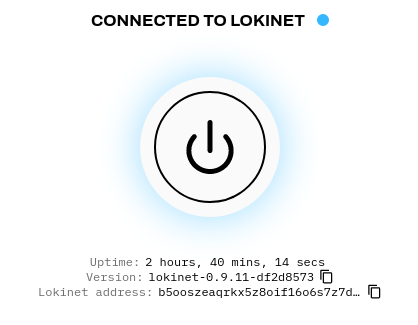
What is Lokinet, Lokinet Exit Nodes & Anonymous VPN and why should you care?
What is Lokinet?
Lokinet is a decentralized onion routed network that uses Oxen service nodes as relays. Lokinet supports any traffic that can be put in an IP packet. It is also designed to be low latency, so you can run real-time voice and video services over Lokinet. Service node operators are economically incentivized to provide bandwidth and processing power for the network.
What is a Lokinet Exit Node?
Exit nodes are computers on the Lokinet that route traffic from Lokinet to the Internet. You could compare an Exit node to a VPN, but one that truly makes your IP address anonymous.
Why should I care about Lokinet?
In one word: Anonymity. If you wish to use the Internet anonymously, Lokinet can help you achieve that. If you are tired of the surveillance by big tech and other entities, Lokinet can help you stay under their radar.
How is Lokinet VPN different from standard VPN?
The major difference is that you don’t have to trust the VPN provider. Onion routing hides your IP address from the provider. With Lokinet VPN even the service provider, such as Privacy Pro Shop, doesn’t know your real IP address. A standard VPN provider, such as Mullvad, Proton, IVPN, ExpressVPN, etc. knows your real IP address at your home, business or mobile device and they can be compelled to reveal that information to authorities.
Why should I trust Privacy Pro Shop as my Anonymous VPN provider?
Because you don’t have to trust us! We don’t know and have no way of finding out what your real IP address is. As far as technical competence goes, we have been in the IT business taking care of servers for 25 years, so we have the experience and technical skill to keep these systems running.
Do I have to reveal my name when purchasing Lokinet VPN?
No! Our purchase process is anonymous as long as you use cryptocurrency for the purchase. We recommend you use Monero for complete anonymity, but we also accept Bitcoin, Ether, Tether (USDT), Litecoin, Binance Coin, Bitcoin Cash & Dogecoin.
Why do you ask for my Country, State & Zip Code?
That is because state sales taxes in the United States are determined based on where you live. If you live in the state of Washington or Arizona where we have offices, we will have to charge sales tax.
How to Buy Session ONS Name without Oxen Cryptocurrency
Session Messenger IDs are impossible to remember. The Oxen blockchain that Session runs on top of allows you to buy a name of your own liking that links to your Session ID. You can do that with the Oxen wallet if you happen to have enough Oxen coins in there. If you don’t have Oxen coins, here is how you do it using other cryptos or credit or debit card. Please remember that most credit cards don’t provid anonymity. In the U.S. you can buy Visa and Mastercard gift cards with cash that are pretty much anonymous. Most grocery stores sell them.
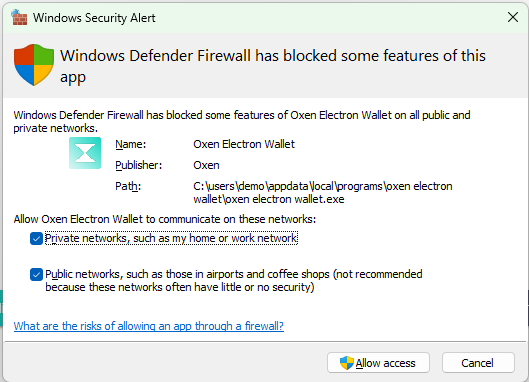
- Download and Install Oxen Wallet app from Oxen.io. Choose either Windows, Linux or Mac. Android wallet is available on the Google Play Store or you can download it as an .APK file from GitHub. iOS wallet is available from the App Store. Sometimes security software interferes with the wallet installation, especially on Windows. When you start the wallet first time Windows Defender pops up with this dialog, checkmark both boxes and click “Allow access”
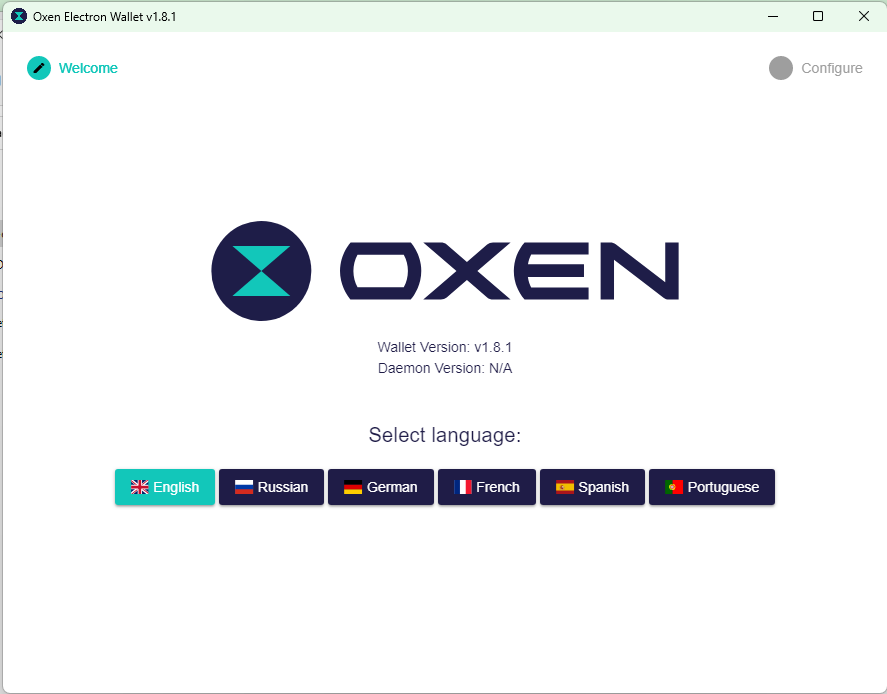
- Open the Oxen wallet app: Choose your Language
 Keep the defaults like Remote Daemon Only, Remote Node Host, Data Storage Path & Wallet Storage Path. Click “Next”
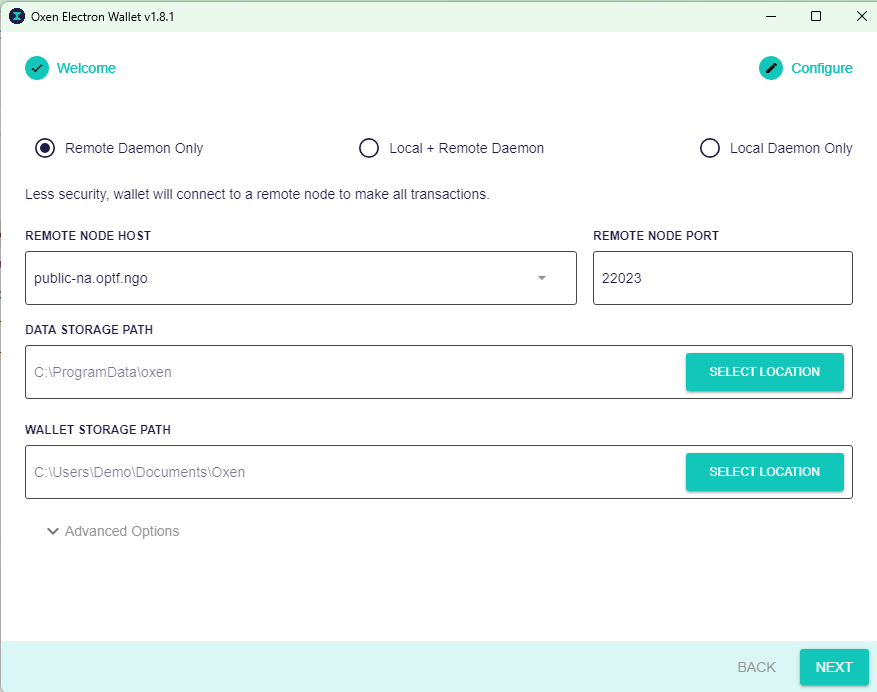
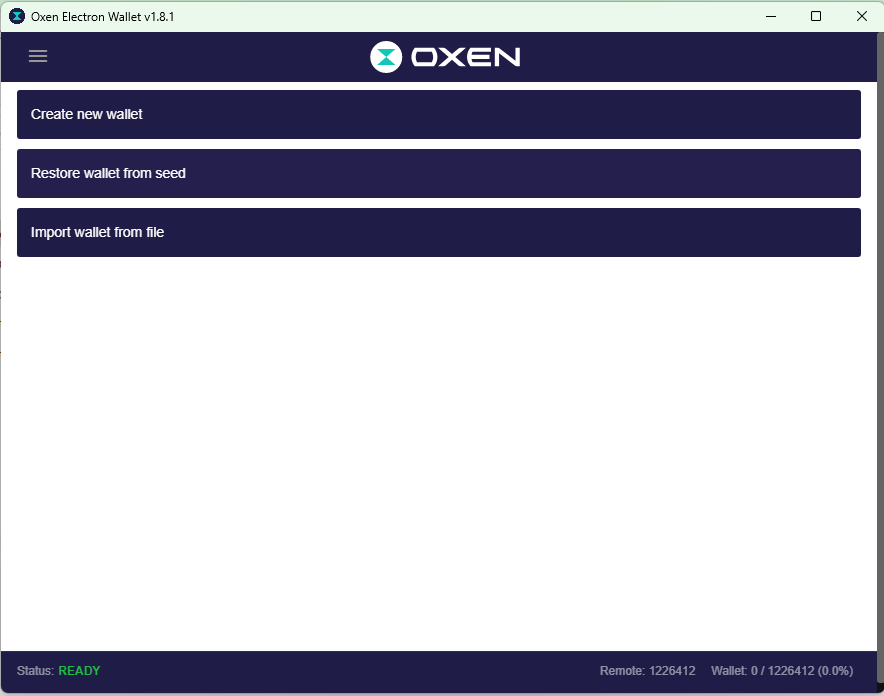
- Create a wallet. Click “Create new wallet”
 Give the wallet a name, such as mywallet, put in a password if you want it and click “Create Wallet”
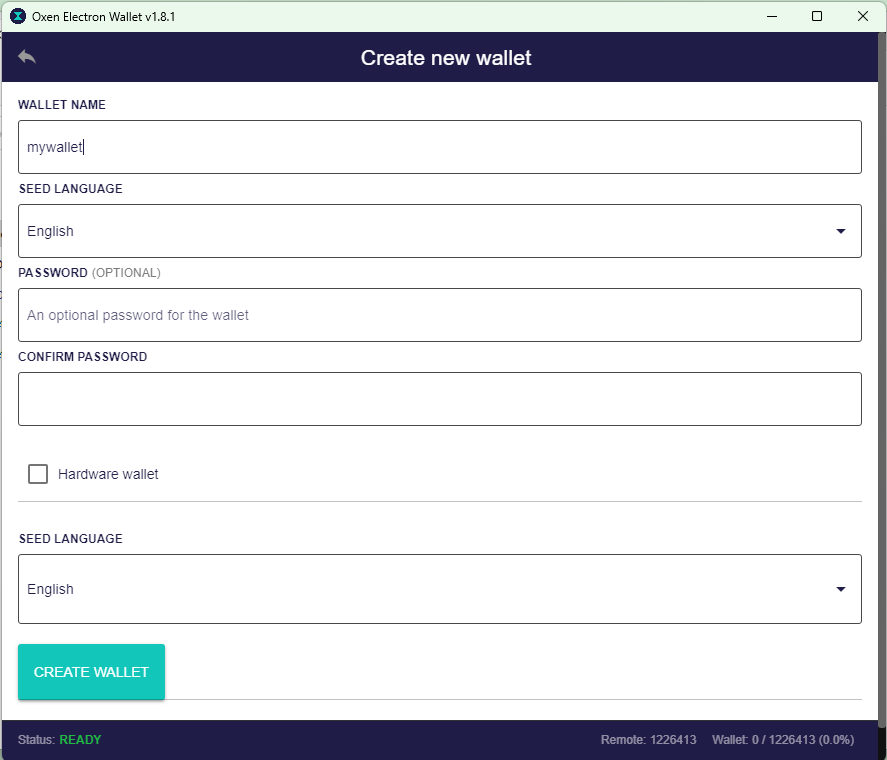 Copy and save the seed words and store them in a safe place outside of your computer. They are the only way to recreate your wallet should something happen to your computer. Once you are done saving the Seed words click on “Open Wallet” button.
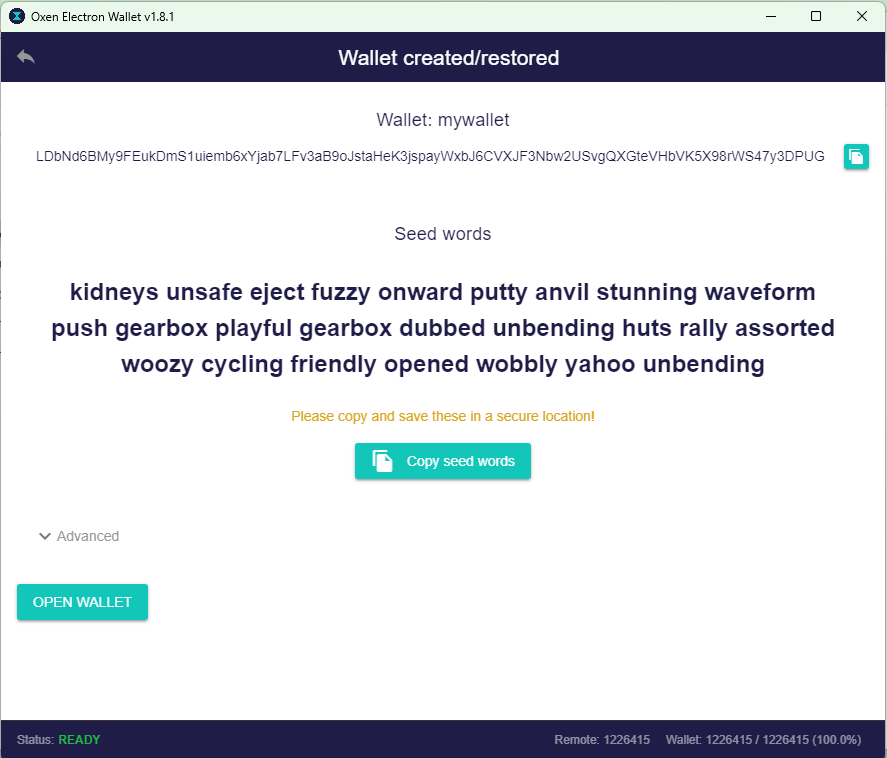
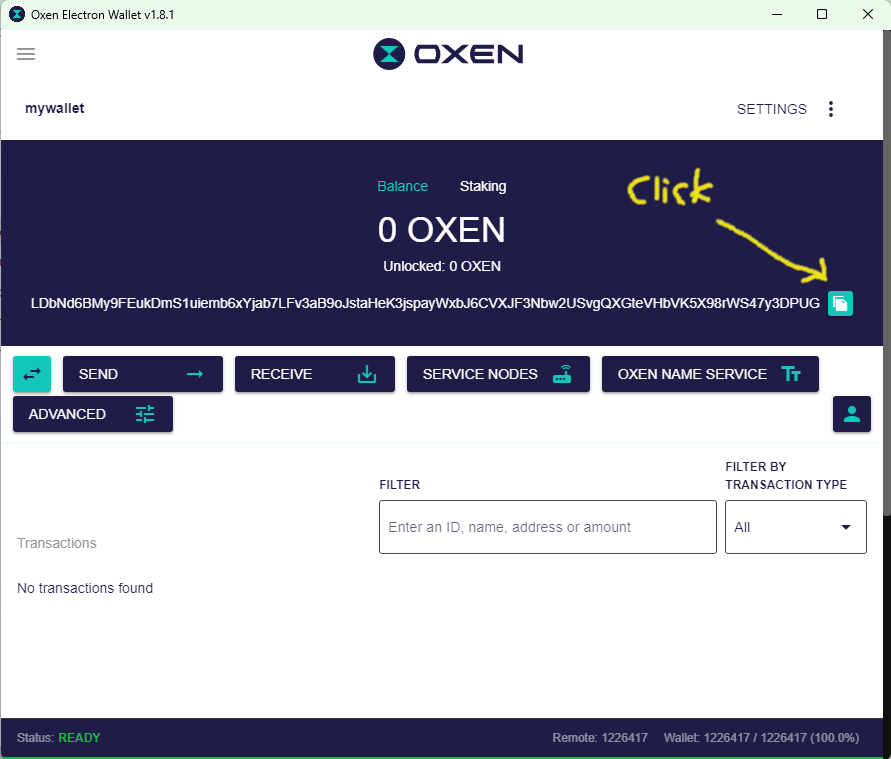
- Once the wallet opens, click on the Copy Address button to the right of the Wallet Address to copy the wallet address to the clipboard.
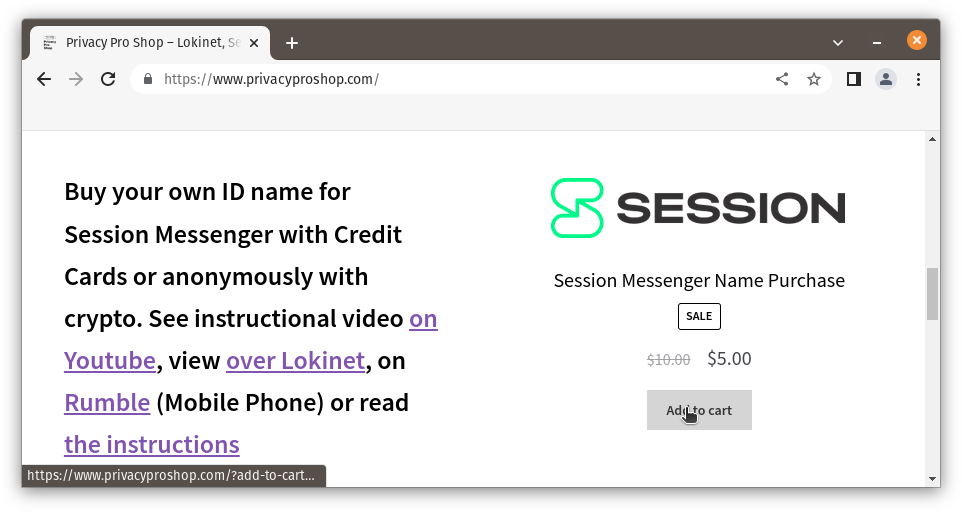
- Go to https://PrivacyProShop.com and click “Add to cart” under “Session Messenger Name Purchase”,
 then click “View cart”,
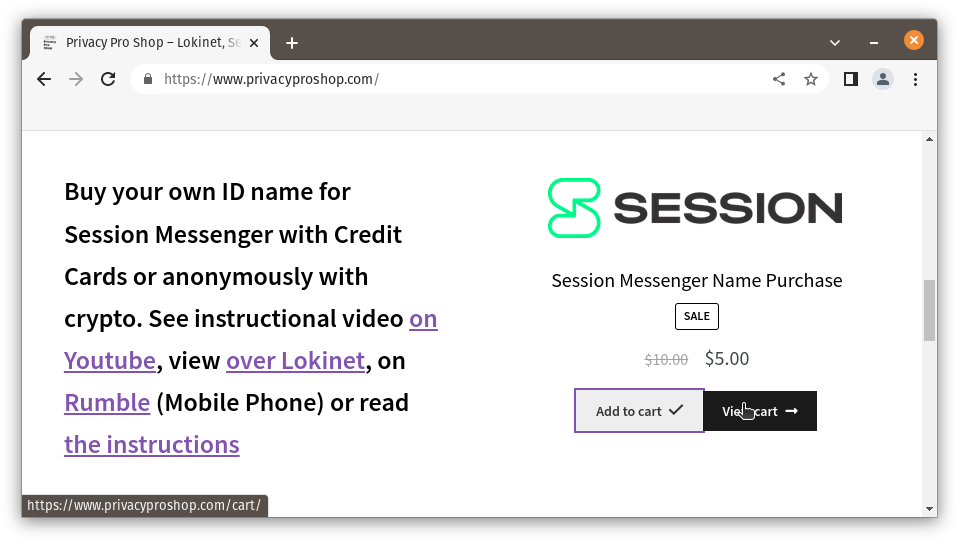 then “Proceed to checkout”.
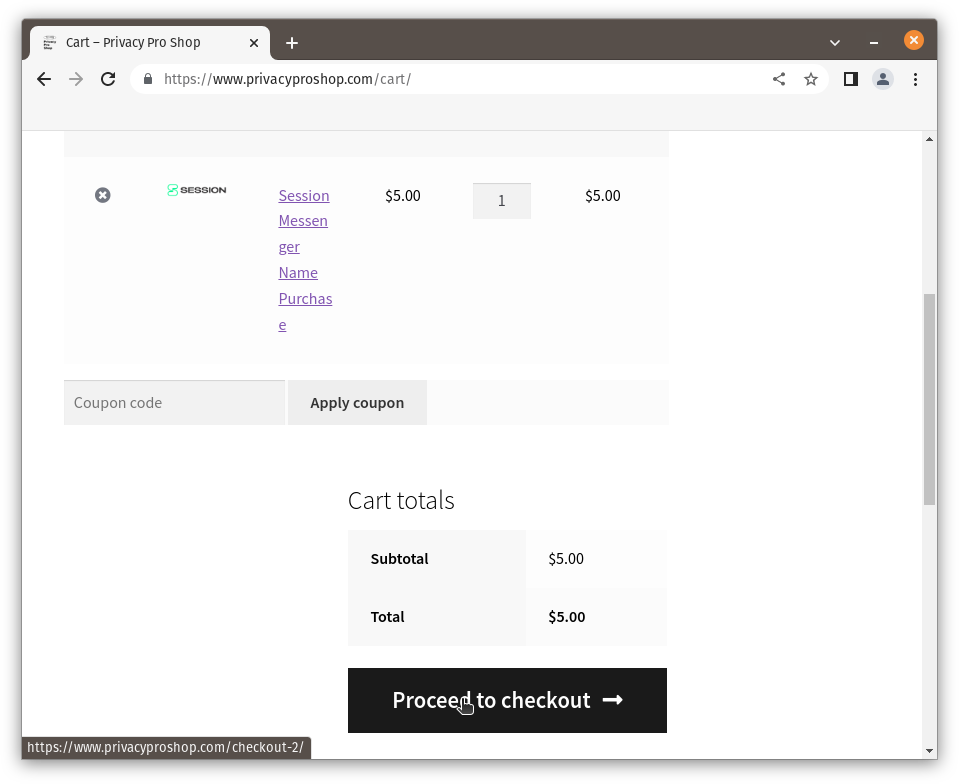 In “Billing Details” enter at least your Country, State & ZIP code (those are required for determining tax rates). Everything else is optional if you are paying with cryptocurrencies. Choose your payment method and click “Place order”
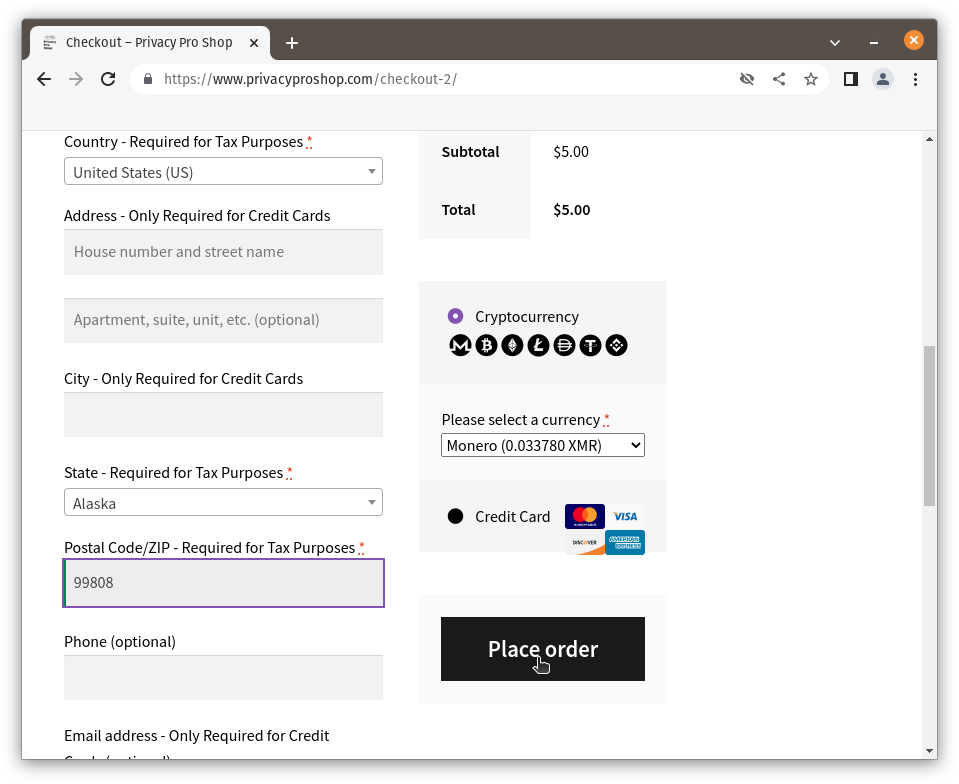 Pay with the method you have chosen. This example is a Monero payment.
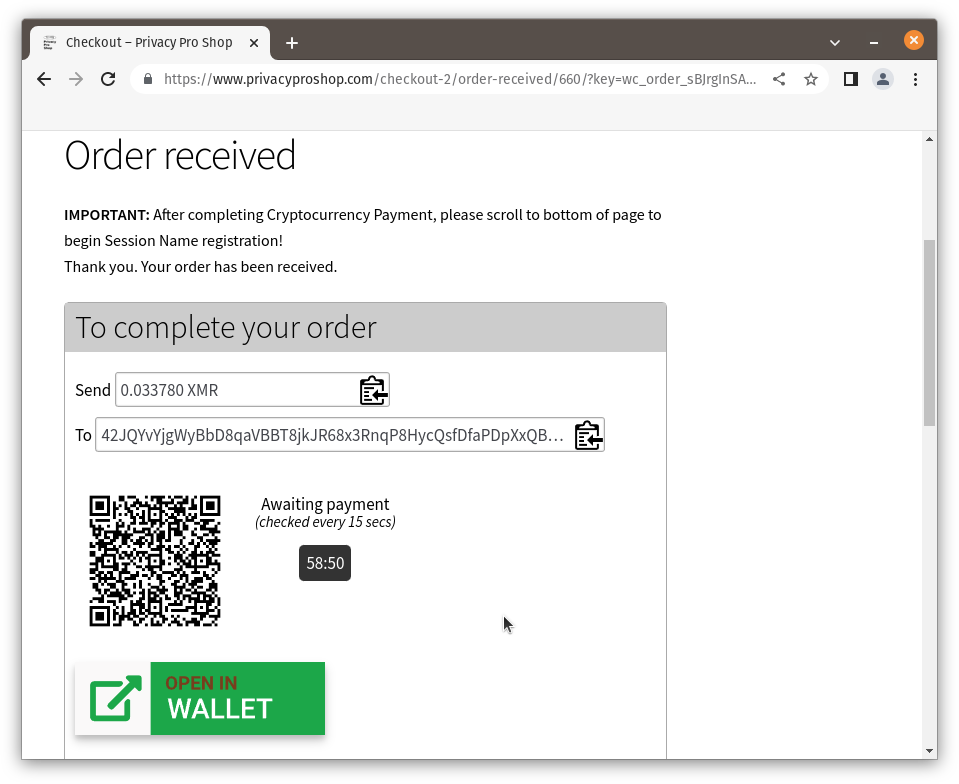 After the payment completes, scroll to the bottom of the page and click on the link to “Session Name Registration Form”
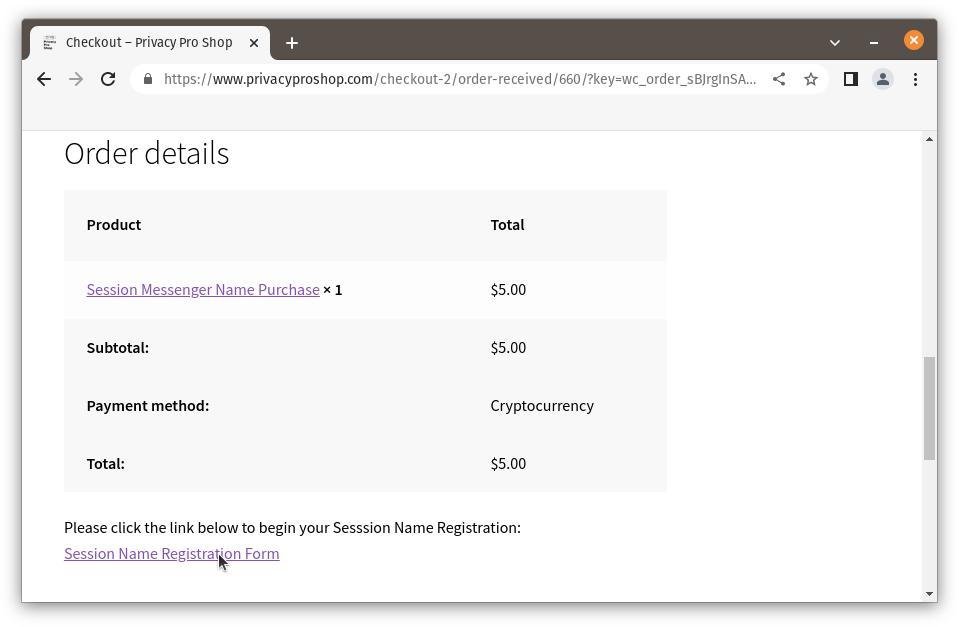
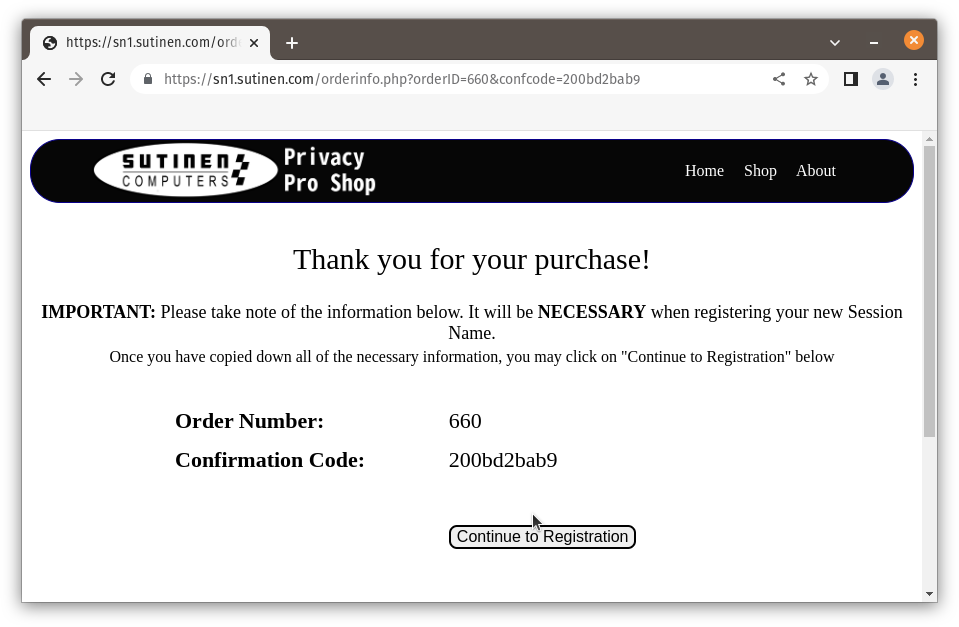
- Please write down the Order Number and Confirmation Code, especially if you didn’t provide an email address as this information is also emailed to you and click “Continue to Registration”
 Enter your desired name and press tab or enter to initiate a lookup for the name. Once you have a name that is available, paste your Oxen Wallet address & Session ID to the respective fields. Then make sure to press tab to enter to activate the “Register My Session Name!” button, and click it.
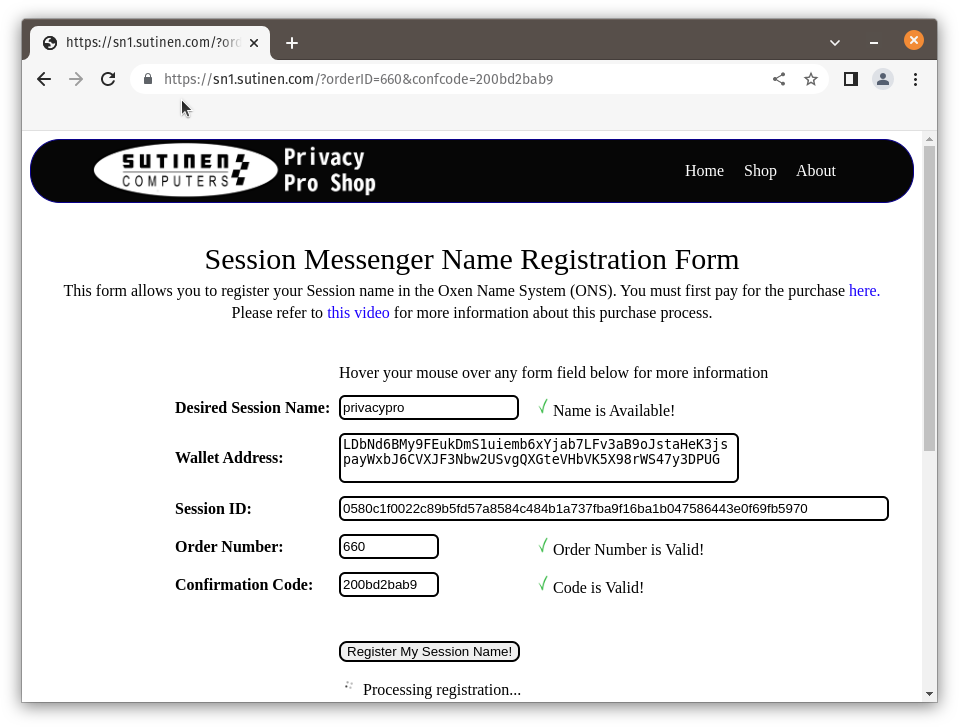 Success! Your Session name should be active within a few minutes.
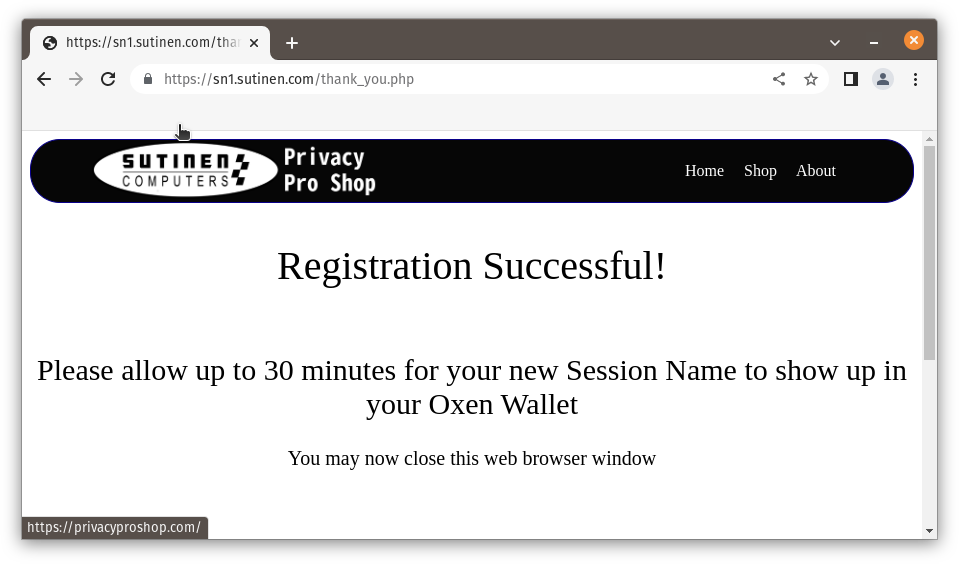
- To see the name in the Oxen wallet, open your wallet and click “Oxen Name Service” button, “My ONS” and you should see an encrypted record.
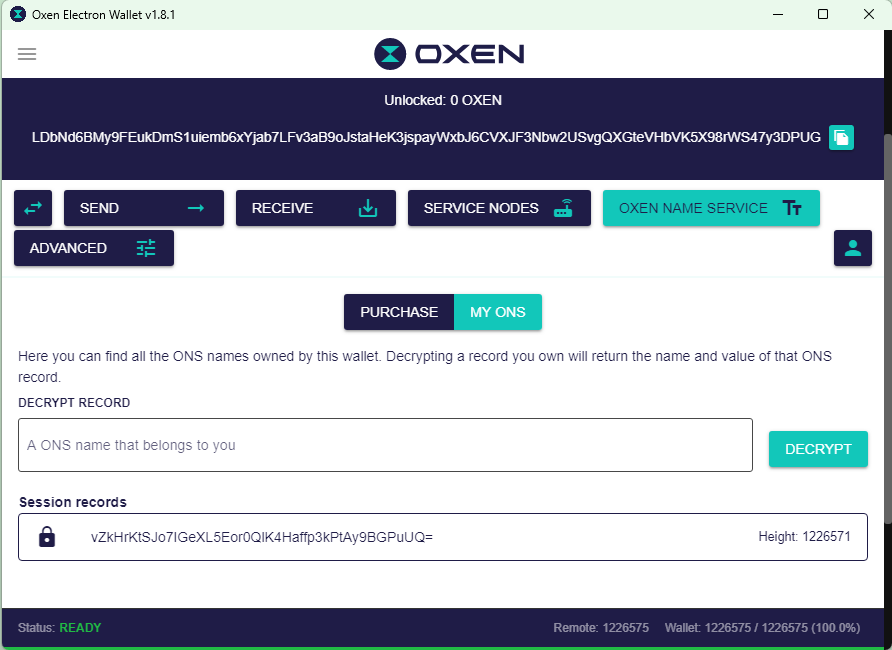 Type the name you purchased and click the “Decrypt” button to see your name.
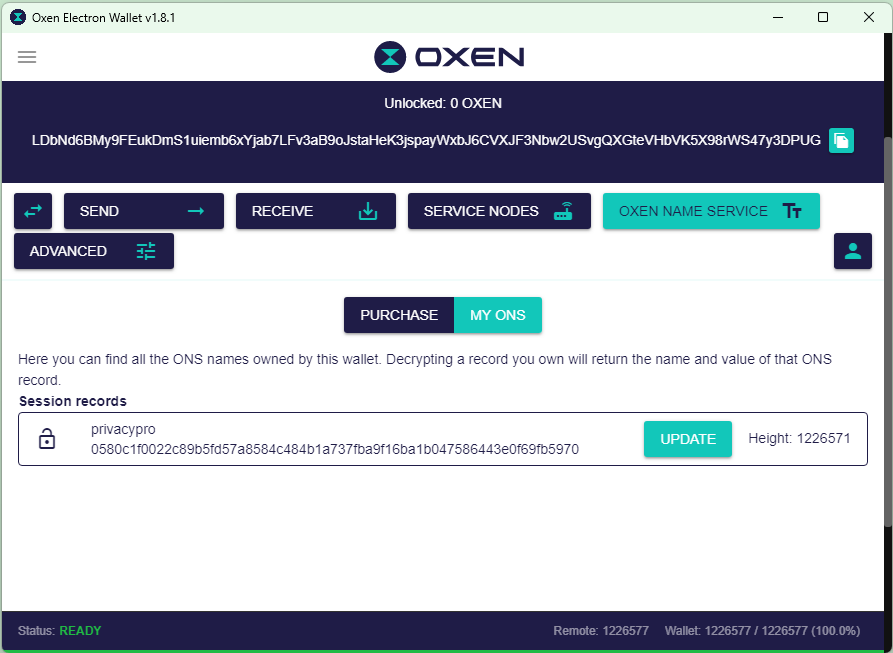
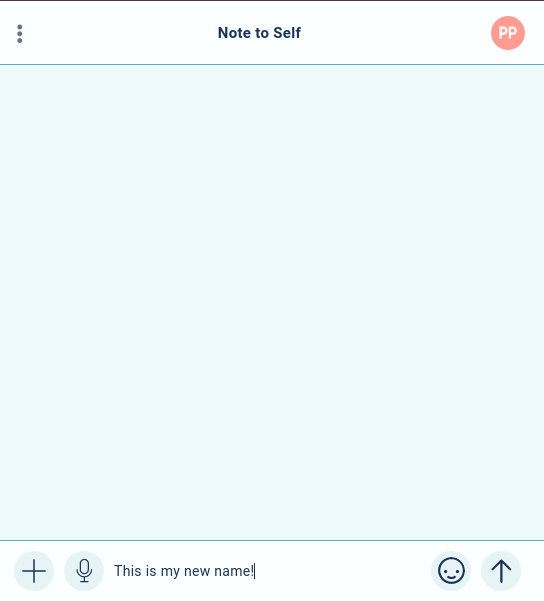
- To test the name in Session you can click new message and send it to the new name. It should resolve the name to “Note to Self”
How to Receive Email Anonymously
This guide is also available as a YouTube video. Watch it on Youtube or anonymously over Lokinet at Invidious.Loki
Every now and then a need arises to be able to receive email anonymously. Maybe you are setting up an account that requires email confirmation, or something else. Now there is an easy way to accomplish that, for free. It’s called Mailsnapp.Loki. And because it is on Lokinet, nobody will be able to find out who read the anonymously received email as Lokinet hides your real IP address.
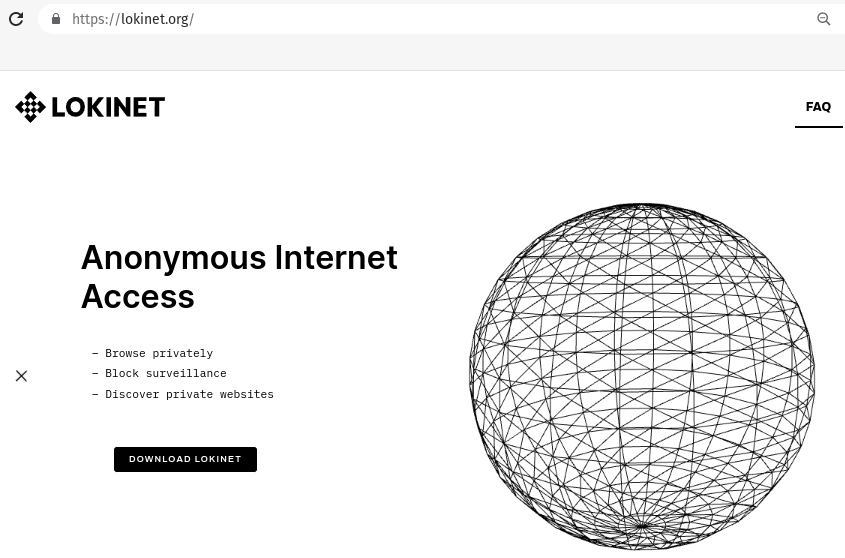
- Make sure you have Lokinet Installed. If not, you can download Lokinet from Lokinet.org. It is available for Windows, Mac & Linux
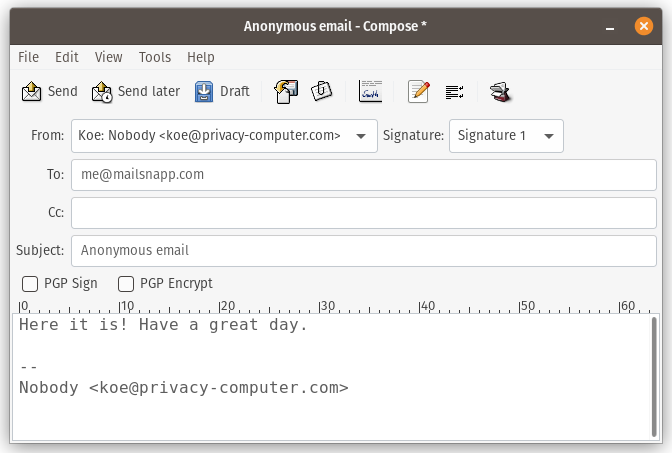
- Send an email to anyaddress@mailsnapp.com. So, something like asd@mailsnapp.com or cvb@mailsnapp.com or mel@mailsnapp.com – you get the idea.
- Connect to Lokinet
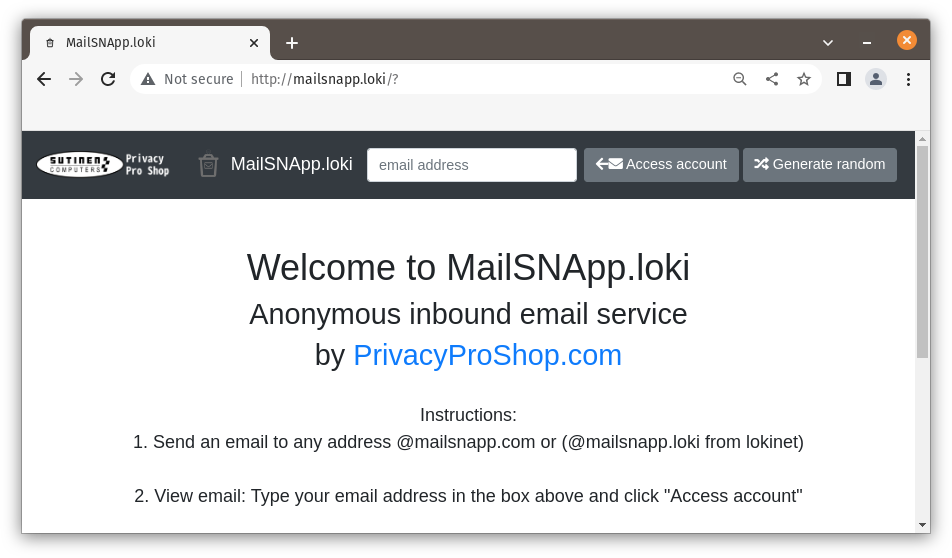
- Go to http://mailsnapp.loki and type the email address you used in the email address box and click “Access account” button. Modern browsers warn about http addresses, and almost all Lokinet sites are http sites because the Lokinet protocol already encrypts the transmitted data. Using https on Lokinet is double-encrypting.
- Click on the green Open Email button
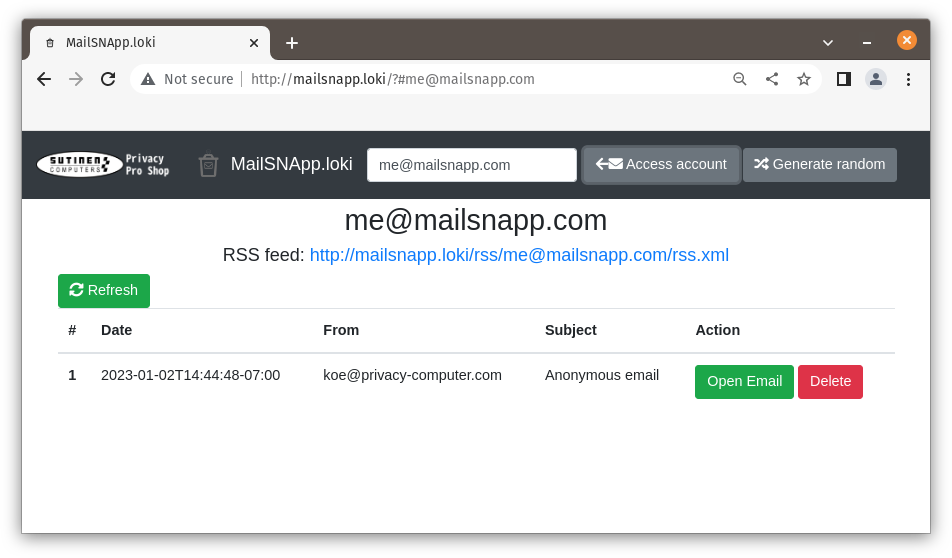
- Read your anonymously received email!
